How to Easily Cancel Subscriptions on Your iPhone
As modern consumers, we often find ourselves subscribed to various services, such as streaming platforms like Netflix or gaming memberships like Apple Arcade. Yet, circumstances change, and so do our subscription needs. When you’ve decided that a subscription no longer serves you, it’s vital to know how to cancel it to prevent unnecessary charges. To make this process seamless, let’s explore how to cancel subscriptions on your iPhone.
Effortlessly Cancel iPhone Subscriptions via the App Store
Managing subscriptions through the App Store is a straightforward procedure, especially on iOS devices like the iPhone and Mac. Even if you’re using a Windows PC, you can still access your Apple ID’s subscription settings through iTunes. This way, you can conveniently view both active and expired subscriptions and effectively cancel app subscriptions.
Also read: If you want to cancel a subscription from Apple
Cancel iPhone Subscriptions from the App Store
- To begin, open the App Store on your iPhone or iPad.
- At the top right corner of the screen, locate and tap on your profile icon.
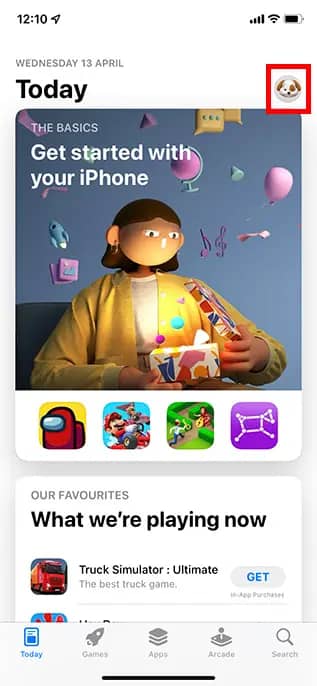
Image Credit: beebom
Within this section, click on the ‘Subscriptions’ tab.
A list of your active subscriptions linked to your Apple ID will be displayed.
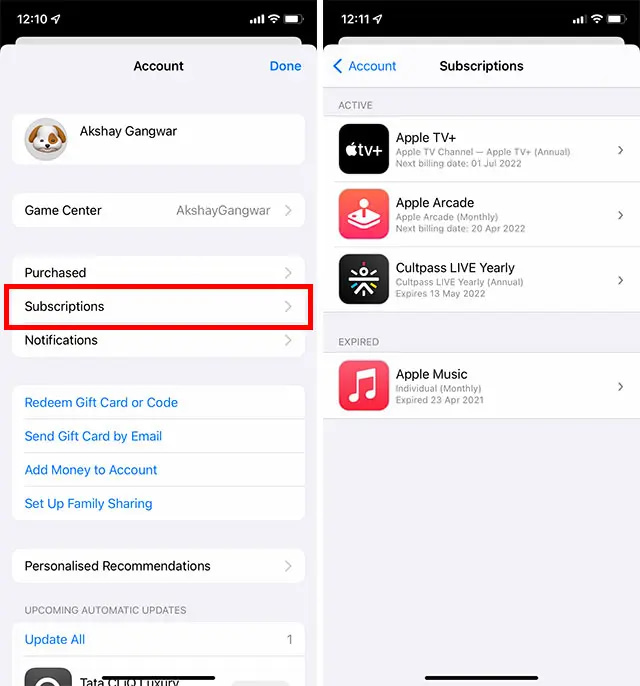
Image Credit: beebom
Identify and select the specific subscription that you intend to cancel.

Image Credit: beebom
In case you prefer an alternative method to manage your subscriptions instead of using the App Store, you can also achieve this through the Settings app. Learn how to cancel subscriptions on your iPhone using the Settings app with these steps.
Steps to Cancel iPhone Subscriptions from the Settings App
- Access Settings: Open the Settings app on your iPhone.
- Locate Your Profile: Tap on your name located at the top of the Settings page.
- Navigate to Subscriptions: Inside your profile settings, find and tap on the ‘Subscriptions’ option.
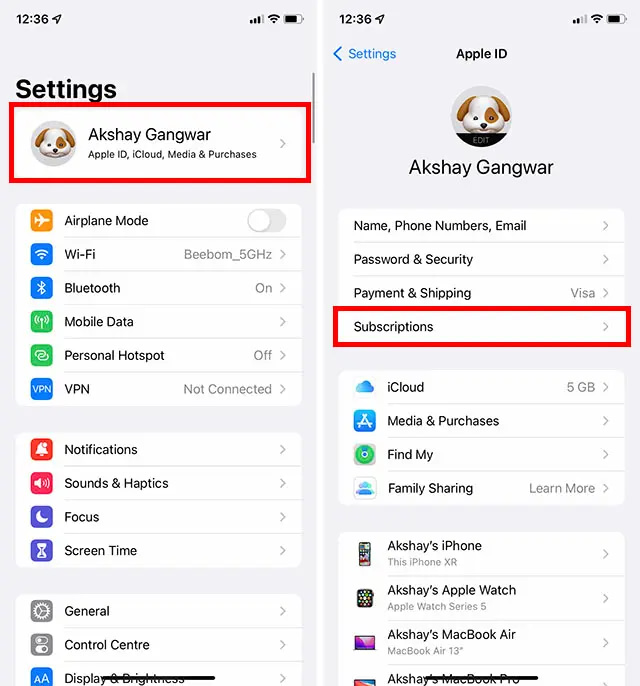
Image Credit: beebom
- View Active Subscriptions: A list of active subscriptions linked to your Apple ID will be displayed.
- Select the Subscription: Identify the subscription you wish to cancel from the list.
- Initiate Cancellation: Tap on the specific subscription you want to cancel.
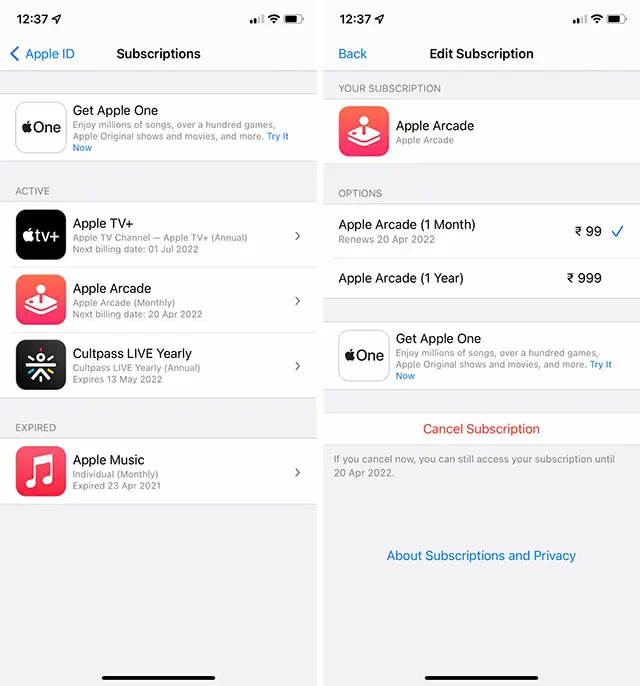
Image Credit: beebom
- Confirm Cancellation: Look for the option labeled ‘Cancel Subscription’ and select it.
- Finalize Cancellation: Follow the on-screen prompts to confirm the cancellation of the subscription.
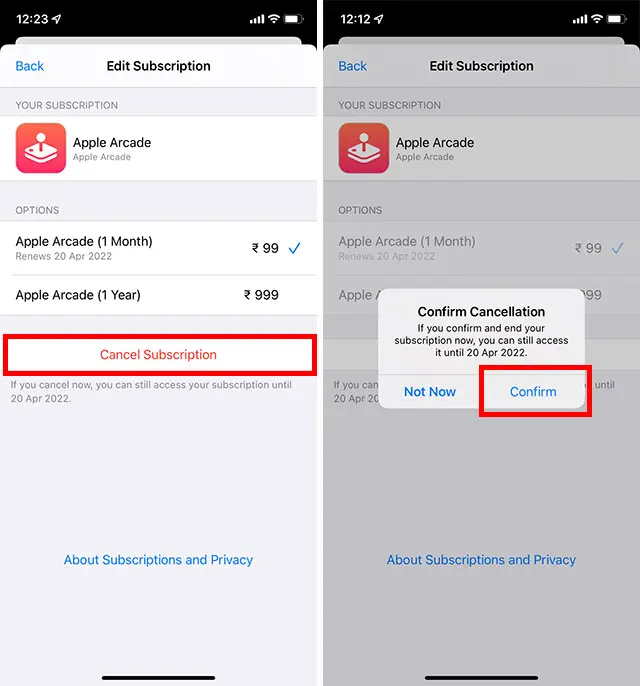
Image Credit: beebom
Important Points to Note:
- If you have an Apple One subscription but wish to retain certain subscriptions within it, choose ‘Choose Individual Services.’ Then, proceed to select the subscriptions you want to keep.
- In the event of canceling a paid subscription, you’ll retain access to the subscription’s services until the next billing cycle.
- However, if you cancel any subscription during an ongoing free trial period, immediate access to the subscription’s content might be revoked.
This method provides you with an alternative route to manage and terminate your subscriptions without relying on the App Store. It’s important to have such flexibility in order to suit your preferences and subscription management needs.
Also read: How to Craft a Boat in Minecraft: A Comprehensive Guide
Conclusion
In the dynamic world of digital services, managing subscriptions has become an essential skill for savvy consumers. Whether you choose the convenience of the App Store or the direct approach through the Settings app, the power to cancel subscriptions on your iPhone puts you firmly in control of your financial landscape.
The step-by-step guides provided above give you the tools to seamlessly end subscriptions that no longer enrich your digital experience. This freedom to tailor your subscriptions to your evolving needs ensures that your resources are allocated where they matter most.
Stay proactive in reviewing and adjusting your subscriptions, whether it’s streaming services, productivity tools, or entertainment platforms. This not only helps you save money but also ensures that your digital life remains aligned with your interests and priorities.
So, empower yourself with the knowledge to navigate your subscriptions effectively, and make informed decisions that enhance your digital journey. Your iPhone becomes more than just a device – it becomes a gateway to a curated and personalized digital lifestyle.